Sunday, November 4, 2012

Tasty, easy entertaining

I love to entertain.  While my budget doesn't run to caviar, I am always looking for ways to entertain tastefully.  An event doesn't need to be that posh but tasty is a requirement.  I firmly believe that you can do easy, tasty and impressive food to show family and friends how much you care.

I had shopped the Whole Foods in Wheaton while waiting for my husband, Jeff to get off of work.  I found a product that intrigued me, Rutherford & Meyer Fruit Paste.  It is whole fruit, cooked down not quite into fruit leather but into a very dense jelly like texture.  I had to play with it!

My concept for the Premier Designs open house we are holding included the fruit paste, creamy goat chevre, walnuts and puff pastry.  Very simple and easy to accomplish, can be made up in advance and VERY tasty!

 
I used pre-made puff pastry to make it easy.  I would have preferred fresh vs frozen but time demands didn't allow me to make my own. I opened the sheet and cut approximately 1" squares to line the bottom of a mini-muffin wrapper.  I had some lovely ones from IKEA that I had gotten on sale last year. 

Next I layered a small piece of the plum fruit paste.  More than a sliver, it was a small chunk.  A slice across the container short ways and then cut into quarters.  Place the fruit paste directly on top of the puff pastry lined cups.  Add a few small pieces of walnut and then top with a generous size of goat chevre.

Bake at 400 degrees Fahrenheit for approximately 10 minutes or until puffed and golden.

The result is crispy yet soft, tangy yet sweet, small yet satisfying.  Would pair well with a nice buttery Chardonnay for the wine lovers out there although it could hold up well with most semi-sweet reds thanks to the plum fruit.

I do believe that these will have to go to Thanksgiving at Mom & Dad's this year. 

Monday, September 24, 2012

Boeuf Bourguignon A La Julia Child

This past weekend was a bit cool for the first weekend of Fall.  Some places in Illinois had frost warnings and the temperature on Saturday was in the mid-50s.  This has caused our trees outside to go from green with a hint of yellow to outright reds.  Hopefully we won't lose the leaves before getting to enjoy their colors.

The cooler weather was tempting me to have something warm and soothing. Real comfort food but what to have? Soup or stew?  The housemate Michelle agreed that stew sounded delicious.  At that point, I knew it had to be Boeuf Bourguignon!  I had been to my favorite foodie store, Whole Foods the weekend before and picked up a couple of bottles of wine that were on sale and a good wine at a price like 2/$20 is a great deal.  Pantago Pinot Noir and Malbec were the featured wines out of Argentina.  Their 2010 Malbec is Wine Enthusiast Best Buy!

The Pinot Noir was, however, fated to be part of a wonderful, warm and delicious dish with a glass or two for the chef.

I went to an old standby, if it was french food then Julia had a recipe for it.  I found her recipe posted on multiple sites with very high ratings so I had to go with it.

The recipe Boeuf Bourguignon A La Julia Child was found on Food.com, recipes for the home cook.  A quick run over what pantry items I had and I was off to the store to soon be home with tasty items.  I followed the recipe almost exactly with a few exceptions.  Most noteably the bacon lardons.  I did use a thick cut sliced bacon instead of going through the process of boiling, cutting and frying the solid chunk of bacon.  I didn't see any negative aspects to using this shortcut and from the start of the cooking process, the house smelled like heaven.  Starting with bacon, then sauteeing the beef in bacon fat and then adding the wine and herbs to simmer for hours.

In my shopping trip, I was unable to get the pearl onions in fresh form, having to use frozen instead.  I do highly recommend Julia's tip to thaw and drain the frozen onions.  I don't think I've ever had them when they have been browned and then added to a dish and a very welcome addition.  The button mushrooms quartered and then sauteed in a little olive oil made interesting "squeaky" noises while tossing them around in the pan.  A fun little fact to see if you find when you try the recipe yourself!

While I did drain the sauce out of the dutch oven to thicken it a little more, I did not pick out the sliced onions and carrots.  We like them and I think that while not "traditional" I will actually add a little more next time.

Here is a plate of the final results. I have one of the dish in the dutch oven as well but I will upload when I find the camera cord or the regretfully misplaced camera SD card.


Hope you enjoy and please do try the recipe.  It has a lot of steps but is very a worthwhile adventure and the perfect thing for a cool evening's dinner.

Monday, September 3, 2012

Tasty and fast food

So, this Labor Day, it was just me and the dear husband.  Eldest daughter moved away to college to pursue her PhD.  Housemates off to a family picnic.

I'm not sure the last time we had a dinner for two like this.  So we did it up a bit but easy and fresh and fun.

Dinner started with a new invention of mine, grilled pesto butter crostini and that was a great start!  Yesterday, we had wandered through one of our favorite stores, Angelo Caputo's Fresh Markets and found this great italian bread that you can bake at home from frozen in it's own bag.  Caldo, il Filone di Grano duro veropane.  They were also sampling the Academia Barilla products on the other side of the store.  While their pesto is fantastic, my immediate thought was to put two great things together to make something extra special.

I mixed the pesto in with some Plugrá butter to form a nice spread.  I sliced the bread thin and then cut each slice in half.  I spread generously with the pesto butter and then sprinkled fresh ground parmesean cheese on top.

I placed the pieces on the hot grill for a brief 3-4 minutes.  This was enough to melt the butter into the bread, toast up the bottom with nice grill lines.  The result was hot, tasty and just awesome appetizers.

Side dish was a caprese salad with basil from our herbs, fresh capellini  mozzeralla and tomatoes from my parents farm.  A sprinkle of sea salt and a splash of red wine vinegar. (I'm sorry I hadn't splurged on the Academia Barilla Aged Balsamic Condiment, it would have been the perfect touch.)

The dear husband grilled steaks and it was a tasty, fast and romantic dinner for two.

Monday, May 14, 2012

Vive la French Macaron


Thanks to recent trips to the International Home and Housewares Show and the National Restaurant Association show in Chicago, I have begun a love affair with a short, dark and tasty treat.  French Macarons.

I had to try my hand at making them and as a first time effort, they turned out very nicely. I didn't quite get the "foot" I was attempting but I also didn't have the time to truly age my egg whites as several places listed as critical to getting the perfect macaron.

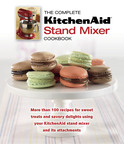
I was able to see Kristen Ryan of the French Pastry School of Chicago do a demonstration on how to make the treats at the International Home and Housewares Show in conjunction with KitchenAid's release of the new iconic look and launch of their recipe book with the treats on the cover.

I drooled over the color of the mixer but felt my trusty KitchenAid mixer might be jealous if I came home loving the new one.  Instead I fell in love with the cookie.  I never did find my download link for the book but will find her recipe somewhere.  I know I will!  Unless I find a benefactor to pay for a weekend class in Chicago, I can commute!

Instead of her recipe, I used the instructions from David Lebovitz.  They appeared to be straight forward and easy to follow. 

I didn't grind my almonds and powered sugar in the food processor. I had found almond flour at Caputo's Market.  I found it to be easy to work with and sifted the almond flour and powdered sugar twice before adding Guittard Cocoa Rouge cocoa powder to make it a chocolate macaron. I then sifted twice more.

Then I focused on the egg whites.  Following the directions, I used my KitchenAid mixer at a medium speed until the whites were frothy, then slowly added six tablespoons of sugar one at a time and making sure they mixed in well.  Turning to a medium high speed, I let the whites whip an extra 3-5 minutes until I had a nice stiff peak with a lot of volume.

Folding the mixture does get to be a workout. It is easy to see why traditional bakers had one arm bigger than the other!  Once mixed to a "lava" like state, I piped onto my sheets and popped them into the oven. Several sites recommend allowing the macarons to sit and crust while others say it is nonsense. This first time, I couldn't wait and popped the chocolatey rounds into the oven.

The aroma perfumed the house. Everyone was commenting on luscious chocolate smell.  A quick 15 minutes later they came out firm, crusted but no feet.  Maybe next time I can get that traditional pedistal with either warmer egg whites, older egg whites or the waiting period.

The first taste was crispy outside, light creamy inside that was reminiscent of a very good brownie with the addition of the cocoa.  I knew I wanted to fill them with Nutella for a simple filling. I don't know what else could be better than the dark chocolate hazelnut filling inside the dark chocolate pastry.

I can't wait to take them to work and my favorite chiropractic team tomorrow.  They certainly won't wait three to four days to age well.  I think that I will definitely be trying more flavors and combinations as I search to perfect the classic cookie.

I hope you enjoy as well! Let me know if you make them and how your recipes turn out.  I'd love to hear from you.


Monday, April 9, 2012

Carrot Carrot Cakes


My eldest daughter saw this picture on Pinterest and wanted to make the same cake for Easter this year.  Since I had been told I was up for desserts, I agreed quickly as I thought it was a cute concept and would be fun and easy to accomplish.

I made the following with items that I had at home and put my own interpretation on the design. I was baking for more than 6-7 people and had to make one with nuts and one without.  Below is a picture of my carrot shaped carrot cakes that went to Easter dinner yesterday.


I started out with a basic carrot cake recipe and made a few alterations. No one wanted raisins, half wanted nuts, no pineapple or coconut either.  Picky group - but I love them and so the requests were honored. To keep the moistness of the recipe, I substituted in applesauce for the pineapple.  To make it a bit more nutritious I used half whole wheat flour and half unbleached all purpose flour.  To make it easy, I used pre-shredded carrots. Looking back though I do prefer to shred my own as I use a finer grate on my carrots which bake into the cake better but if you want quick and easy, pre-shredded still works.

I used the following ingredients to make the white-chocolate cream cheese frosting:

2 ounces white chocolate
1 (8 ounce) package cream cheese, softened
1/2 cup unsalted butter, softened
1 teaspoon vanilla extract
1/2 teaspoon orange extract
4 cups confectioners' sugar
2 tablespoons heavy cream

For the cake I used the recipe below. I've made the adjustments discussed above. I used Penzey's spices and flavorings as I love being able to buy them fresher when I need.  The nutmeg, cloves, cinnamon, vanilla, crystallized ginger as well as the orange extract and vanilla in the frosting all came from Penzey's
Ingredients


1 C. whole wheat flour
1 C. all purpose flour
1 Tbsp. non-aluminum baking powder
11/2 tsp. baking soda
3/4 tsp. salt
3/4 tsp.grated nutmeg
1/2 tsp. ground cloves
4 large eggs
11/4   c. packed dark brown sugar
1/2 c. sugar
11/2 cup veg oil
1/4 cup heavy cream
1 TBS vanilla
1TBS crystallized ginger, chopped fine
1 TBS. orange zest
3 Cups shredded carrots
1/2 cup chopped walnuts (used in half the batter only)
1 C. unsweetened applesauce

Instead of baking in the typical rounds or squares, I used my Wilton Brownie Pan which gave the perfect long shape needed when the cakes were cut in half and stacked.  Baking time was about 30 minutes at 350 F.

When the cakes were cool, I cut them in half longwise and stacked the cakes with a layer of the white-chocolate cream cheese frosting in the middle.  I then cut and trimmed the cakes to give a more carrot-like appearance followed by a crumb coating of the white-chocolate cream cheese frosting.

Then came the fun!  I love, love, LOVE Duff Goldman's fondant!  This is very easy to handle, stores well and most people who say they don't like fondant go ahead and eat it!  With another brand, I found so many people hated the taste that they left it on the plate.  With Duff's fondant, almost all will eat the fondant.  That to me is enough to keep using it but when it is so easy to use as well, you couldn't make me switch back!  I had met some of the people behind the Duff products at this year's International Home and Housewares Show. They were great and patiently listed to my rave on the product.  I would love to play with all their items but alas,time and money will have me playing when I can.  If you are afraid of fondant, this is a very forgiving and easy to use product.

I had some fondant left and so I mixed what I had of yellow and a bit of red together.  It was redder than I wanted and I knew it wouldn't be enough to cover both cakes so I had to make a trip to the store to get a large container of white. After 10-15 seconds in the microwave, the white mixed in with the red and created a lovely deep carrot color!  Quick rollout, smooth, shape and cut.  I used the back of a knive to make indents and then used brown food color on a toothpick in the creases to create depth.  I then smoothed with alcohol to even out the color and fill in. I though it really brought out depth to the carrot grooves!

The pre-made cake had buttercream leaves but I used the green fondant that I had in the pantry to create the stems and leaves.  I rolled out the strings and used pieces from my Wilton Floral Collection Flower kit
to make the leaves.  I had to stop before I was fully happy with the results but in the end cakes looked like a very good representation and the family enjoyed it.

Hope you enjoyed this and please, let me know what you thought!

Tricia


Friday, January 20, 2012

Warming up a snowy night


When the snow falls heavy and the world goes cold, white and quiet, what do you do to warm up your family?

I started by making an awesome oven roasted chicken with potatoes, carrots, and onions (a subject of a future blog). The dinner was lovely but wasn't quite right without something to finish it up. I went to my standby cookie recipe from Big Soft Chewy Cookies by Jill Van Cleave.

There is a newer edition out but I stand by the first book and if you can, I'd recommend buying a copy as they are now available for as little as $1.00 through Amazon and other web sellers. I know I found some great copies and will be buying them to give to my daughters who have several of the other recipes like Snickerdoodles in their own recipe boxes.

I've had this book for almost ten years and haven't had a recipe that I haven't liked out of this book. Family and friends have commented on my notes on the pages such as "Jeff says make again". I love putting in the comments of family and friends as they are the ones who I am baking for.

Growing up, I would bake for the family on Saturdays. I remember using the mixer for all the cookies. While tasty, I wasn't quite happy with the texture. Having room temperature butter and egg and not over-beating the dough solves this problem. Use a wooden or heavy spoon and a bowl instead of using the mixer. (Sorry my beloved Kitchen-Aid, you aren't needed here.) Remember, the key is that you MUST put your butter and egg on the counter and bring to room temperature. I learned this from Big Soft Chewy Cookies.

Beat with wooden spoon one stick of butter with 1/2 cup each white and dark brown sugar until smooth. Yes i t should be dark not light brown sugar. Add one egg, one teaspoon of vanilla and two tablespoons of milk. I have used heavy cream, whole milk and buttermilk all with good results as that was the liquid I had in the fridge so if you have 2%, 1%, fat free or whole, don't worry. Again beat until smooth.

Next sift together one cup of all purpose flour, one half cup of cake flour, 1/2 teaspoon of baking powder and 1/4 teaspoon salt. Add flour mixture to butter and egg mixture and stir only until dry ingredients are combined. Stir in one cup of chocolate chips and 1/2 cup walnuts if you want nuts in your cookies.

I use a medium scoop for my cookies and put them on a silpat covered cookie sheet. The author recommends a 1/4 C measuring scoop or 2 oz scoop, remember, these are BIG and Chewy!


Bake in a pre-heated 375 Degree F oven for 120-15 minutes. You are looking for cookies that are browned on edges and firm to the touch.

Move cookies to a rack to cool. They tend to disappear after about five minutes.